0.1: Installation
- Time to Complete: 15 minutes
Prefer the terminal? → Claude Code CLI guide
Prerequisites
- Claude Pro or Max subscription (NOT free tier)
- Sign up at claude.ai if you don’t have one
- $20/month for Pro
- Mac (macOS 10.15+) or Windows 10+
- 4 GB+ RAM
- Internet connection
- No coding tools required!
On Linux? There’s no desktop app yet - use the Claude Code CLI guide instead. Everything in the course works there too.
Install the Claude Desktop App
This course runs in the Claude Desktop app.
- Go to claude.ai/download
- Mac: download the installer, open it, and drag Claude into your Applications folder
- Windows: download the installer and run it
- Open the app and sign in with your Claude account
Open the Code Tab
-
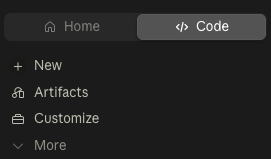
In the Claude app, click the Code tab (upper left):
-
Start a new project - Claude will ask where to keep it; anywhere is fine
The Code tab is full Claude Code with a folder picker and buttons instead of commands. If you can see it, you’re installed.
Paste the Start Prompt
With your new project open, paste this prompt:
What Happens Next
Claude sets itself up, pulls the course materials into your project, and tells you how to begin. When it’s ready, type /start-1-1 and your first lesson starts.
That’s the whole install. The next page walks through getting the course in more detail.
What’s Next
0.2: Get the Course & Start → - Get the course materials and begin learning